
Diverter valve stuck between heating and hot water
When the boiler gives you one but not the other, this is usually the part behind it. Here is how to check it, and what fitting a new one involves.
Browse fault code guides and parts articlesWhat the diverter valve does, and what it looks like when it fails
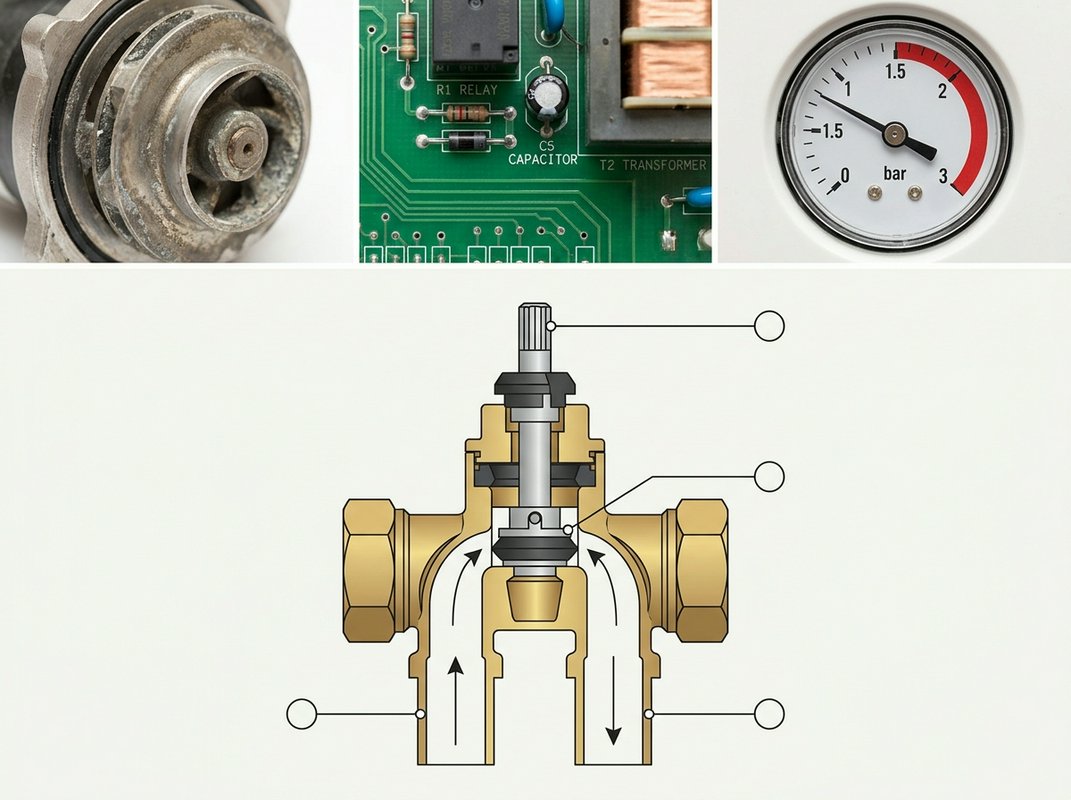
A diverter valve sits between your boiler's heat exchanger and the two circuits it feeds: central heating and hot water. On a combi boiler it moves a shuttle or disc back and forth to send hot water to whichever circuit is calling for it at that moment, closing off the other. On a system or regular boiler you may find a similar valve, sometimes called a mid-position valve, doing the same job further out in the pipework.
The valve only ever serves one circuit at a time, which is why a fault here shows up as one of two mirror-image symptoms.
- Hot water works, heating does not: the valve is stuck sending flow to the hot water side and will not switch across.
- Heating works, hot water does not: the opposite fault, with the valve stuck on the heating circuit.
- Lukewarm water on both sides: the valve is moving but not seating fully, so some flow leaks across to the circuit that should be closed.
- A tapping or humming noise when a tap is opened or the heating calls for warmth: often the valve's motor or actuator trying to move against a stuck or worn shuttle.
These symptoms overlap with other faults, including a failed pump or a stuck three-port valve motor, so they point to the diverter valve as the most likely cause. A reliable way to narrow it down is to feel the two pipes leaving the valve body while the boiler is calling for heating and then for hot water: if one pipe stays cold when it should be carrying flow, the valve is not switching over as it should.
Because the valve carries heating and hot water, not gas directly, checking it is generally within reach for a competent homeowner, though opening the boiler casing and working near gas-carrying components brings its own restrictions. The replacement steps, part numbers by brand, and the point at which the job must pass to a Gas Safe registered engineer are set out on this page's replacement guide.
Diverter valve part numbers by boiler make
Diverter valve design changes across a manufacturer's own production run, so the model name alone rarely tells you which part fits. Use the appliance badge or the physical part label to confirm before you order.
| Boiler make | What can vary by model | What to check before ordering |
|---|---|---|
| Ideal | Diverter valve design and actuator type can differ across the Logic and Logic+ ranges. | Match against the model and serial range on the appliance badge. |
| Worcester Bosch | Greenstar generations have not all used the same valve body or actuator. | Confirm whether the listed part is a full assembly or an actuator-only replacement. |
| Baxi | Combi ranges such as the 200 and 400 series can use different valves to earlier Baxi models. | Check the exploded parts diagram for your exact model before ordering. |
| Vaillant | ecoTEC ranges have used more than one connector and motor fitting over time. | Compare the connector on your existing part against the replacement before fitting. |
| Viessmann | Vitodens valve assemblies can differ by output size and production generation. | Check the reference printed on the valve body where it's visible. |
This is general guidance on how diverter valves vary within each manufacturer's range. It doesn't cover every model or firmware variant, so verify against the physical part label and the manufacturer's own documentation before ordering.
Diverter valve replacement checklist
Use this as the order of operations, not a substitute for the manufacturer's own instructions for your model.
-
Isolate the electrical supply
Turn off the boiler and isolate the electrical supply before touching any panel or wiring.
-
Drain down the affected circuit
Close the isolation valves and drain the section of the heating circuit around the valve body to avoid a flood when it is disconnected.
-
Record the wiring before disconnecting the actuator
Photograph or note wire positions on the actuator before disconnecting them, since terminal layouts differ between makes.
-
Remove the actuator from the valve body
The actuator usually clips or screws off the valve body separately from the valve itself, and many faults are the actuator alone.
-
Check the replacement matches before fitting
Compare the old part against the new one for orifice size and spindle fit, not just the model name on the box.
-
Renew the seals on refitting
Fit new O-rings or seals where the valve body meets the pipework.
-
Stop and call a Gas Safe registered engineer where gas-carrying parts are involved
Where the diverter valve forms part of the sealed gas or flue assembly, or the boiler needs recommissioning with a flue gas analysis afterwards, this work must be carried out by a Gas Safe registered engineer.
-
Repressurise and test both heating and hot water
Refill and re-pressurise the system, then run the boiler through a full heating and hot water cycle to confirm the valve switches correctly.
Torque settings and seal types vary by model, so check the manufacturer's instructions for your specific boiler before fitting anything.
Manufacturer part or pattern equivalent: what to check before you buy
A diverter valve listed under the boiler manufacturer's own part number and one described as a pattern equivalent can look identical in a photograph and still behave differently once fitted. The difference usually sits in the detail: the shape of the actuator connector, the material the valve seat is moulded from, or a spindle length that is a few millimetres off. None of that shows up until the part is in your hand.
What actually differs
A manufacturer part (OEM) is made to the boiler maker's own specification and carries their part number. A pattern equivalent is made by a third-party manufacturer to fit the same application, usually at a lower price, but it is not the same casting or assembly. The differences that matter in practice are:
- The actuator connector type and orientation, which changed across some model years
- The valve body material and seal compound, which affects how it copes with system chemicals over time
- The spindle or shaft length and the fixing pattern to the valve body
- Whether the microswitch or auxiliary contacts are wired the same way as the original
What to check before ordering
The physical part label on your existing valve is the most reliable reference, more reliable than the fault code page or the listing photo. Compatible alternatives will work on many boilers, but connector types and fixing patterns have changed across model years, so a part that fits one year of a model range will not always fit another.
- Read the part number stamped or printed on the existing valve body
- Note the boiler make, model, and approximate age or serial range
- Compare the connector type on the listing photo against the one on your existing valve
- Check whether the listing states the model years it covers.
A compatibility check against a manufacturer service manual can confirm whether a part number and a boiler model are supposed to match, but the boiler in front of you may not match the manual exactly if it has been repaired before with a different part. Any compatibility tool works from documented specifications current to a stated date, and it can still be wrong for an individual boiler, so treat the result as a starting point and verify against the physical label before you order.
For the failure symptoms that point to a diverter valve fault and the fitting sequence once you have the right part in hand, the main guide covers both in order. If you are not sure whether the swap itself falls inside DIY territory or needs a Gas Safe registered engineer, check that before you check the part number, because it changes what you order and how.
Find a diverter valve for your boiler
Once you know the part number, the next step is finding someone who has it in stock.